This tutorial will help you to configure Microsoft Outlook 2016 for an internet email account
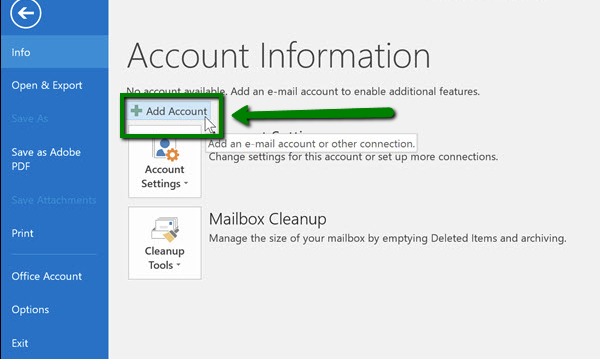
- Open Microsoft Outlook 2016 on your device. If don't have any mailboxes added yet, you will see Info > Account Information page. Click the +Add Account button. In case you have mailboxes set up before, go to the File tab > Info > Account Information page and click the +Add Account button:
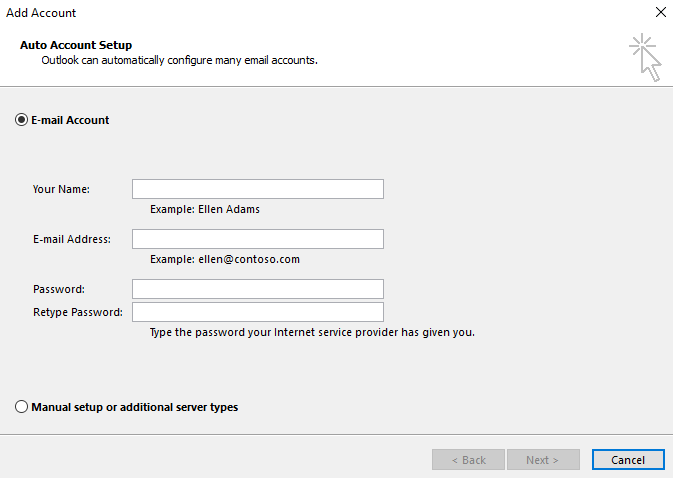
- Select E-Mail Account and enter your information:
- Your Name: the name of your account in Outlook
- E-mail Address: full email address
- Password: password for your email account
-
Click Next, disregard any warnings that appear and proceed to the next step.If you are not able to proceed, you may need to repeat the process using the manual setup. The detailed instructions can be found below.
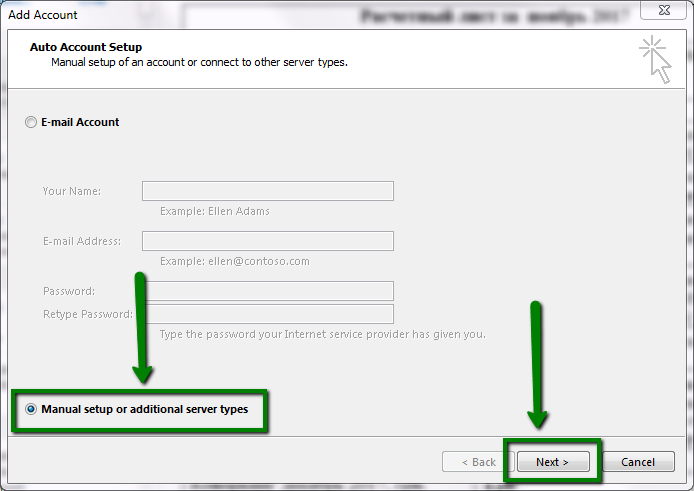
- Select the Manual setup or additional server types option and click Next:
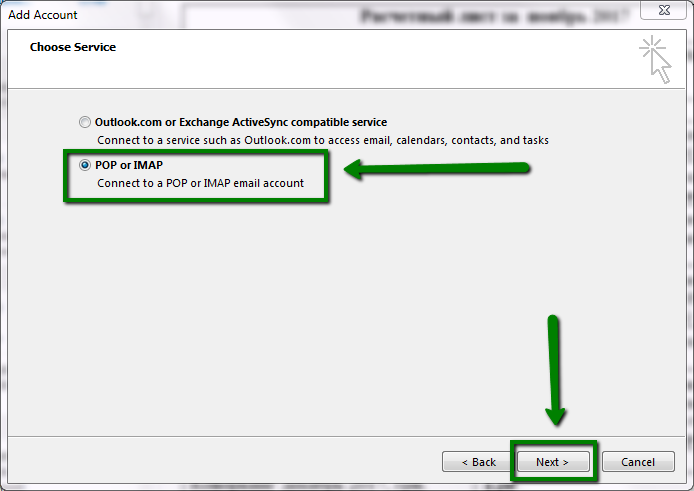
- On the next page, select the POP or IMAP option and then click Next:
- Compare POP vs IMAP types.
-
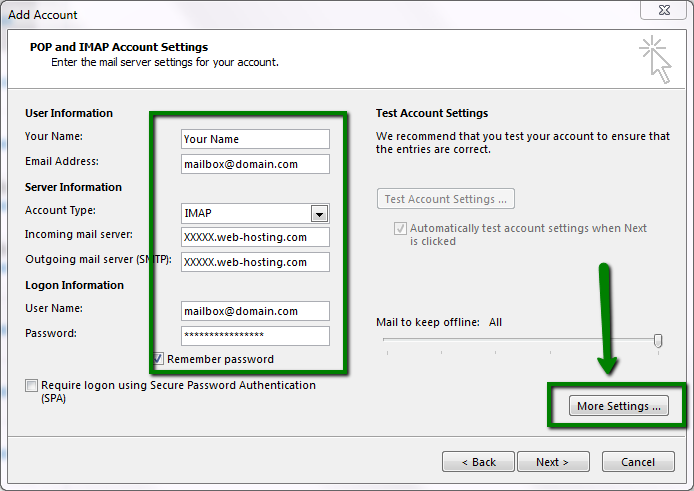
Enter mailbox and server details:Your Name - the name you would like the recipients of your emails to see
Email Address - your full cPanel email address
Password - password from your cPanel mailbox
Incoming mail server: (refer to your welcome services email)
Outgoing email server:(refer to your welcome services email)
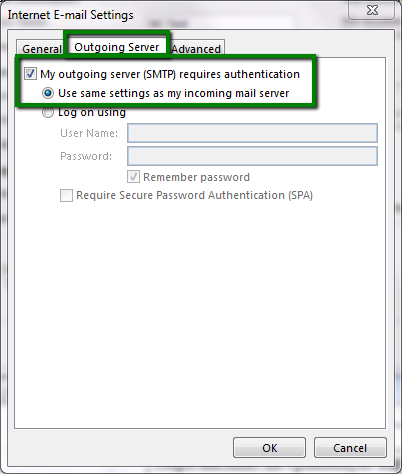
Require logon using Secure Password Authentication (SPA): should be unchecked - Next, click More Settings… and go to the Outgoing Server tab. Select the option called My outgoing server (SMTP) requires authentication and select Use same settings as my incoming mail server:
- Go to the Advanced tab and use the following ports and encryption based on the connection type you have chosen:
- Incoming server (if are using IMAP): 993 port for SSL (Secure), 143 for TLS (Non-Secure)
- Incoming server (if you are using POP3): 995 port for SSL (Secure), 110 for TLS (Non-Secure)
- Outgoing server (SMTP): 465 port for SSL (Secure), 25/587 port for TLS (Non-Secure)
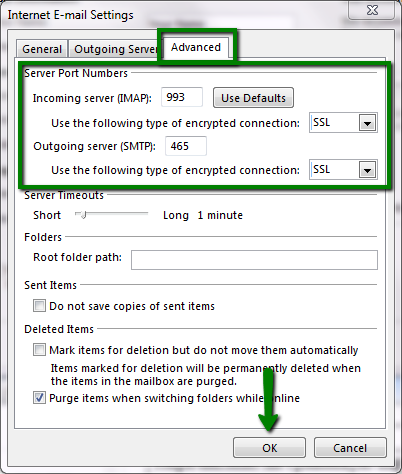
- Click OK > Next
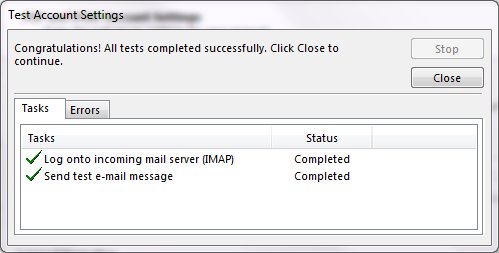
- In case all the settings are correct, you will receive the following message:
That completes adding an internet mail account to a Local Outlook 2016 Client.


