This tutorial will help walk you through setting up your Webmail account natively on your iPhone/iPad/iPod touch.
Prerequisites
A Webmail account has been created previously and you have received your mail account information.
Procedure
This procedure is based on vendor recommended practice that can be found here: https://support.apple.com/en-us/HT201320
It has been modified to best fit your new mail server environment.
There are two ways you can set up an email account on your iOS device using Mail—automatically and manually.
The required setup is manual since you will be connecting to your own custom domain name (yourdomain.com) services mail provided on Northwoods Web Designs Mail Servers.
Set up an account manually
Make sure that you know your email settings, which can be found in the email mail settings and usage guide sent to you. Then follow these steps
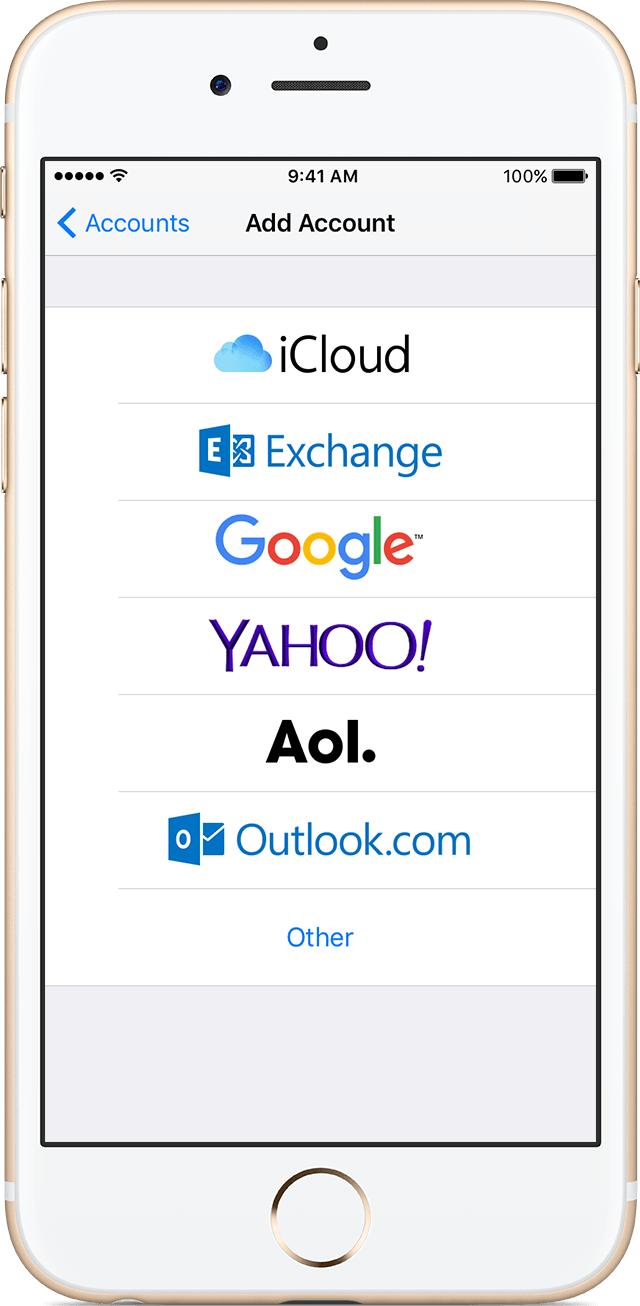
- Go to Settings > Mail > Accounts > Add Account.
- Tap Other to add your account manually.

3. After selecting Other, then tap Add Mail Account.
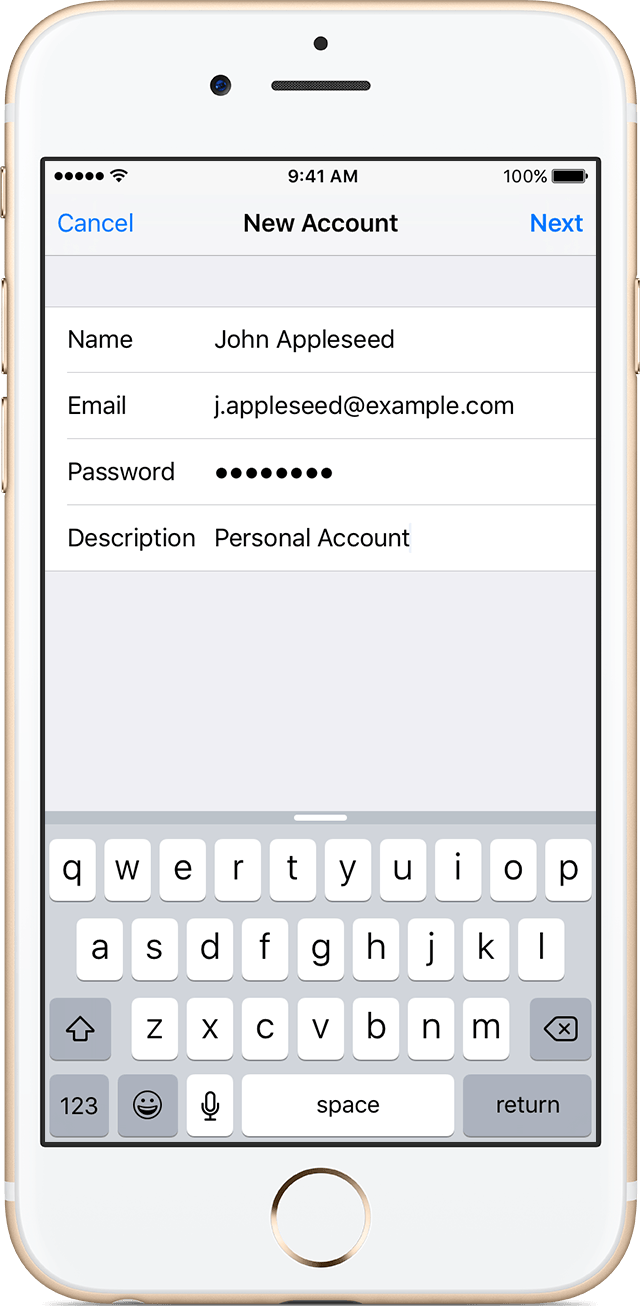
4. Enter your name, email address, password, and a description for your account.
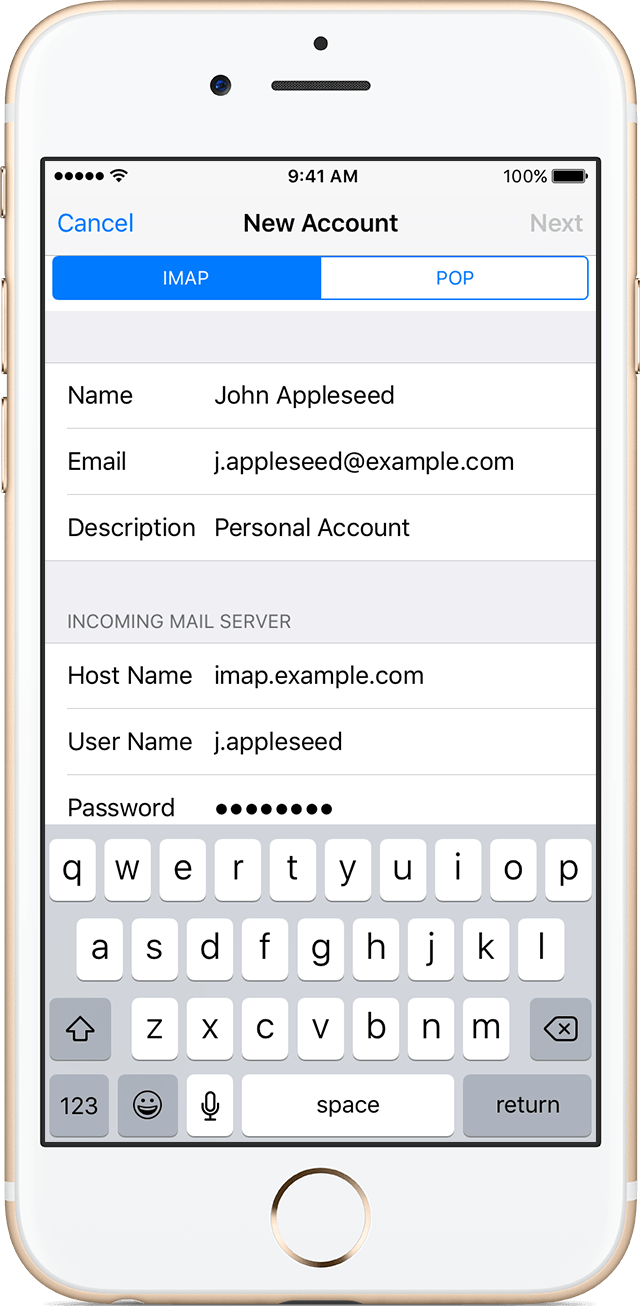
5. Choose IMAP or POP for your new account. Both options are available, unsure which to use? Refer to this article .
- !Important Enter both the Incoming Mail Server and Outgoing Mail Server fields with your Hostname, , username (Your FULL email address) and password.
- Then tap Next.

You should now be able to successfully connect to your new NWD mail server to retrieve and send mail.
More iPhone/Apple Get help related documents
- Learn more about using Mail.
- Learn more about using a POP email account.
That completes this tutorial.
If email is not working, recheck each step and setting. It is easy to make a typo in any one of the fields that is required for integrating with IOS devices (iPhone/iPad/iPod Touch).

